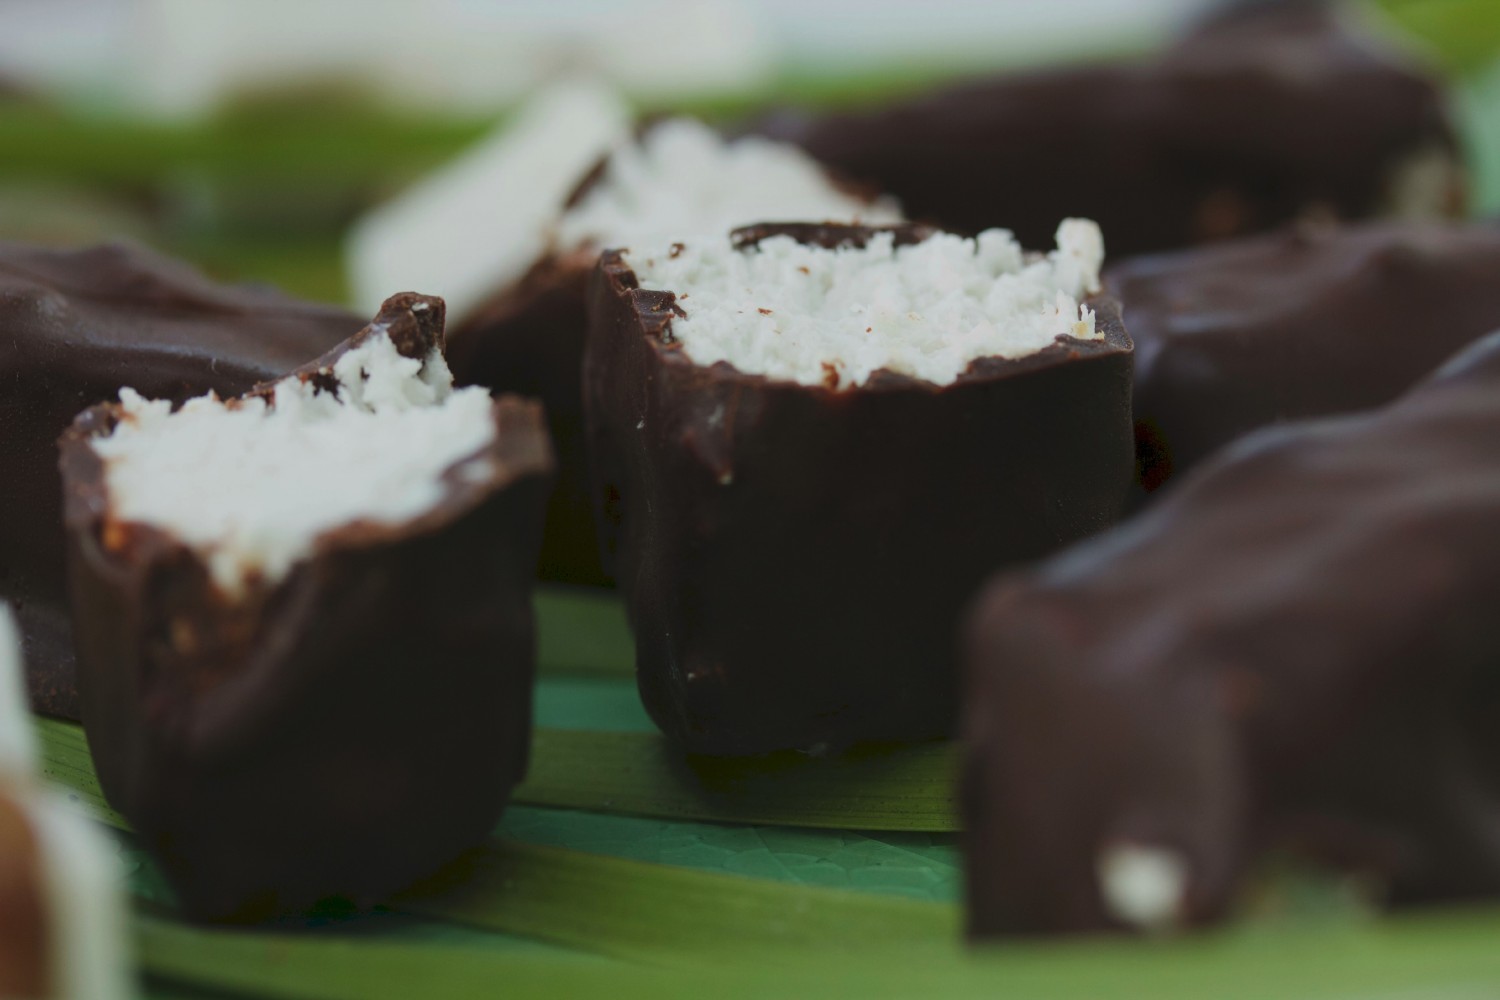
For any of you who are friends with us on facebook, you may have seen our home-made bounty bars a few months ago. I seriously couldn’t believe these healthy versions could actually taste so like the real thing. We’ve had so many recipe requests I decided to share it with you.
Our version of this popular bar doesn’t contain any nasty ingredients; no processed chemicals, refined sugars, bad fats or additives. Yes, I use dark chocolate, but this is one of the richest sources of antioxidants which boost the immune system and protect our bodies. Plus, the bars satisfy any sweet cravings but lack the addictive pure sugar hit which makes you binge. You can easily stop at just one (well maybe two).
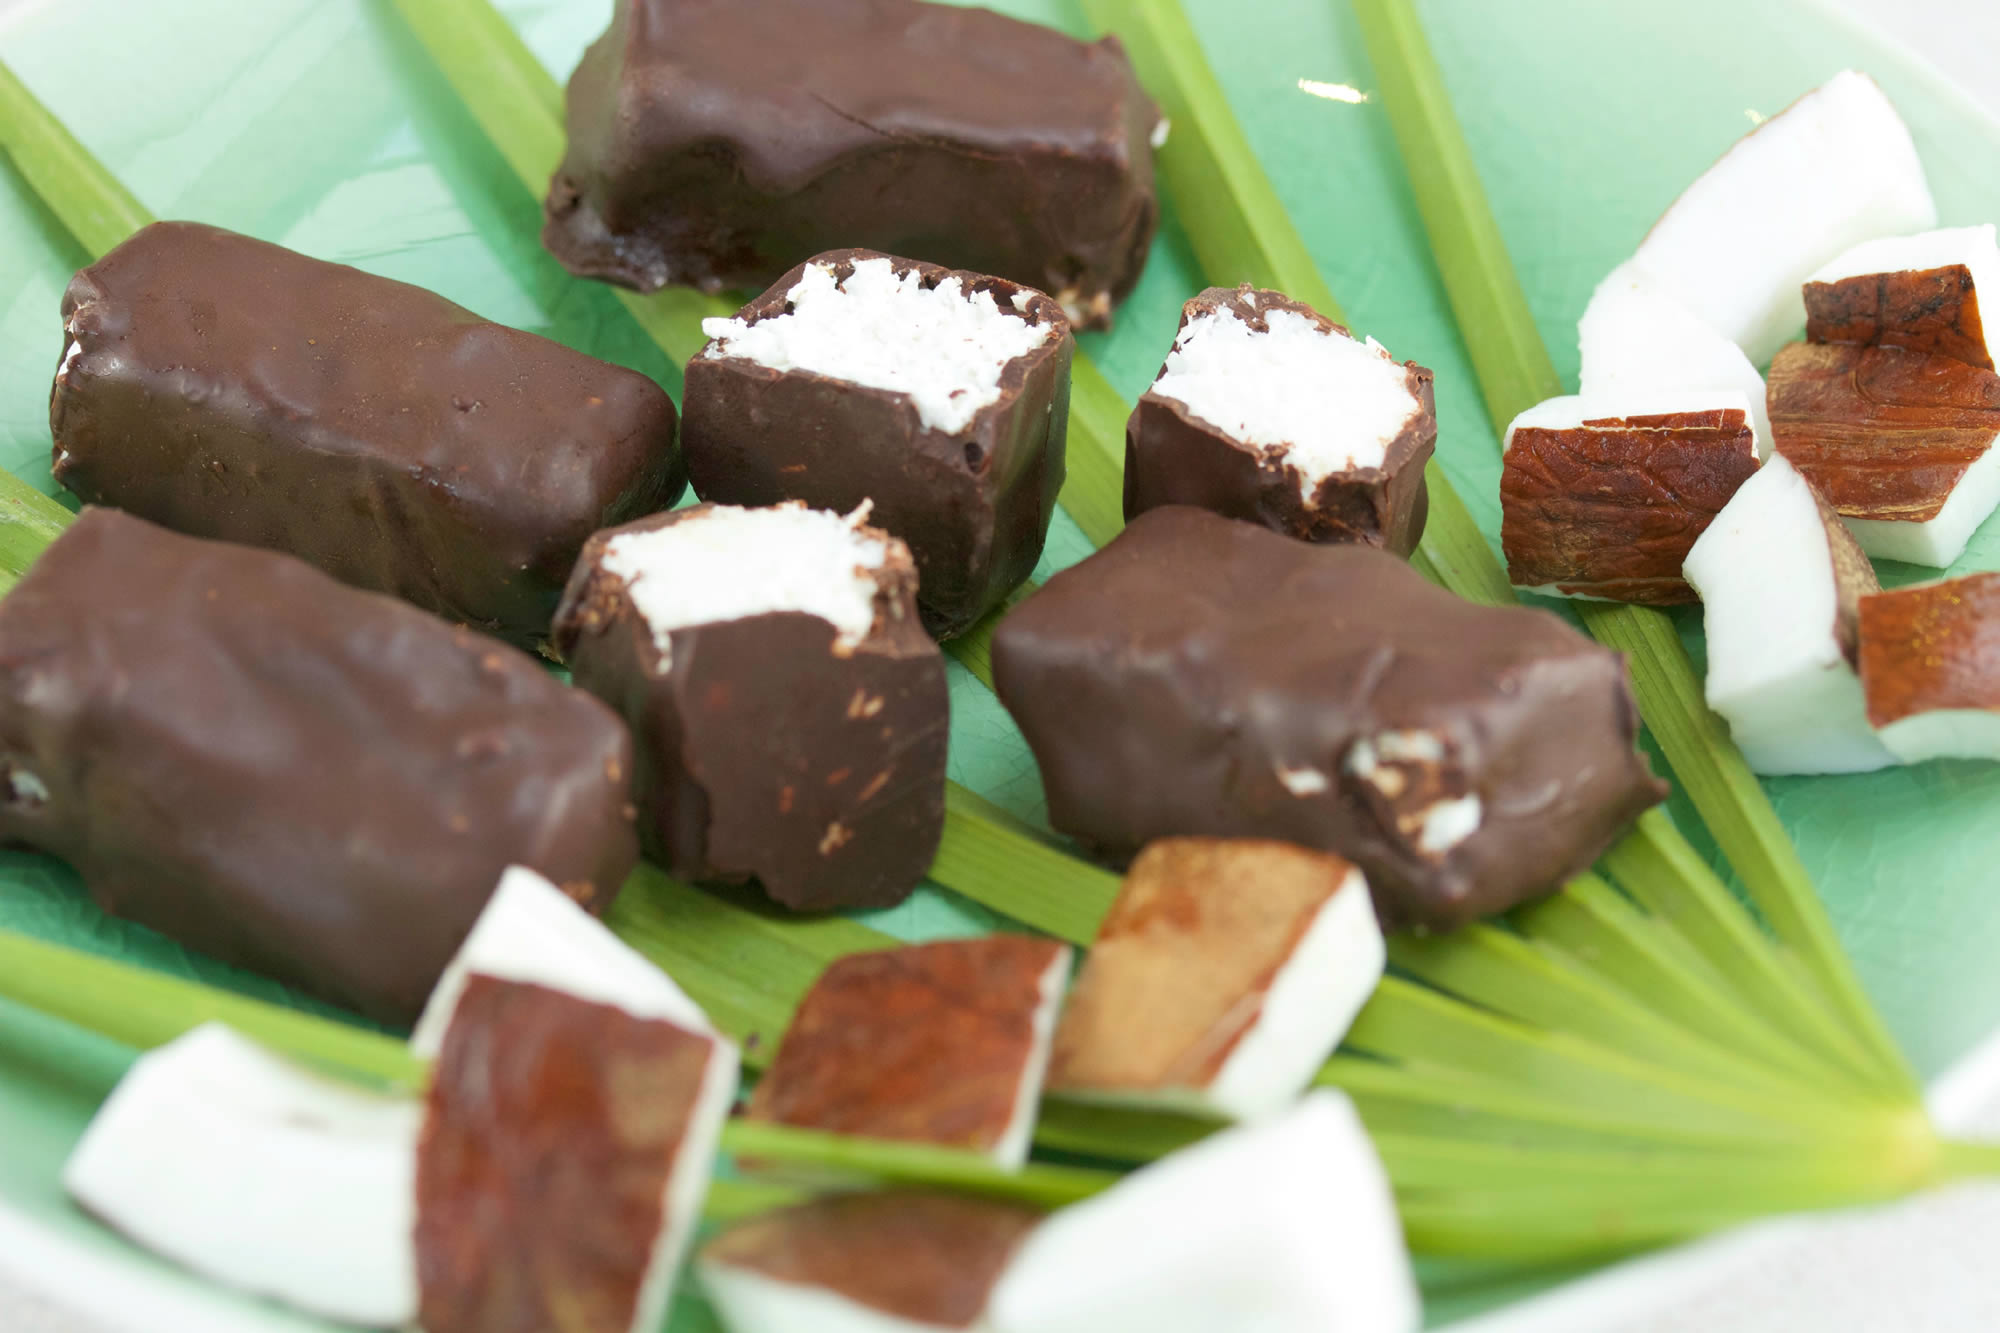
These bars can be frozen which is a great way to stop yourself eating too many – although when eaten straight from the freezer they do taste like ice creams which are also delicious.
- 1 tin coconut milk
- 3 tbsp coconut oil
- 3 cups desiccated coconut
- 1 tbsp coconut sugar or preferred sweetener
- 1/2 tsp vanilla extract
- 100 g dark chocolate
- Heat the coconut milk and coconut oil in a small pan. Add all the other ingredients except the chocolate and cook for about 5 minutes until all thick and sticky.
- Line a deep baking tray or dish (around 25cm x 20cm( with parchment and pour in the coconut mixture. Allow to cool and cover and place in the freezer to set (1 hour) - this helps them keep their shape when covering with warm chocolate.
- When the coconut filling has set, remove from the freezer and lay out on a chopping board. Use a sharp knife to cut into small bar sizes. You may need to heat the knife a little or allow to thaw slightly first if the mixture has frozen solid.
- Break up the chocolate and place in a glass bowl over a pan of boiling water. Stir continuously until the chocolate has melted, ensuring that no steam gets into the bowl.
- Using either your fingers, or two forks, dip each bar into the melted chocolate and place on a plate lined with parchment.
- Leave the bars in the fridge for ten minutes to harden the chocolate.
We hope you enjoy these chocolate bars, let us know how you get on in the comments below or on our facebook page and don’t forget to sign up to our newsletter to receive more recipes, nutrition tips and expert advice.
You Might Also Like

